November 22, 2014
32bit and 64bit Widnows system folders
Here are some quick & useful info regarding Windows system folders in 32bit and 64bit:
For 32bit:
%SystemRoot%\system32\
%SystemRoot%\syswow64\
For 64bit:
C:\Windows\system32\
%WinDir%\system32\
For 64bit from 32bit application:
%WinDir%\sysnative\
Example: When accessing Windows 64bit system folder from Visual Studio post build commands (where all versions are actually 32bit), then use %WinDir%\sysnative\ not %WinDir%\system32\.
Hope this helps!
November 17, 2014
Error: feature with ID is not installed in this farm and cannot be added to this scope
Error:
In Visual Studio 2013 or 2010 when you are trying to deploy your
feature (using the default Active Deployment) and your SharePoint farm has a multiple servers, then it will fail to deploy the solution & activate the features, and will throw
the following error message:
“Error occurred in deployment step ‘Activate
Features’: feature with ID '{guid}' is not
installed in this farm, and cannot be added to this scope.”
Also, the solution
will show ‘Not Deployed’ in Farm solutions page in Central AdministrationReason:
This is a
bug in Visual Studio 2013 (see this post for same issue in VS2010). Visual Studio uses the Microsoft.SharePoint.Administration.SPSolution.DeployLocal() method that can only deploy/activate features on local machine when its the only server in farm.
Objective:
To preserve the way the developer works. Developer need not
worry about target environment (number of servers in farm for example), and should
not need to run PowerShell commands every time the code changes. Developer
should only use the Build > Deploy menu item in Visual Studio as usual, and
the deploy process should figure it out how to install the package &
features.
Solution:
Its actually a workaround until Microsoft fix with their Visual Studio. The idea is to replace Visual Studio feature activation action by a
PowerShell script that will make sure the feature was installed then activated
properly. The script is to be called as a post-deployment command.
Tested with:
Visual Studio 2013 Update 2, and SharePoint 2013 Visual Web Part
How To Use:
Example: “D:\TeamShared\iibraheem\PSproj\PSproj”
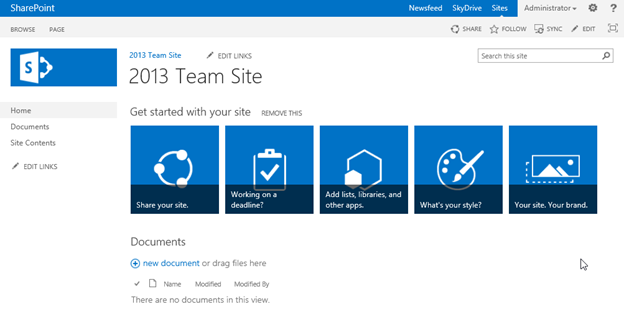
2- If you are using Visual Studio 2013 to target SharePoint 2013: Make sure that you set the ‘Site Url’ property of your project to target a SharePoint 2013 site that has the new SP2013 UI.

The reason is that your Visual Studio 2013 visual web part will NOT work for a SharePoint 2013 site that has a SP2010 UI (coming from a SP2010 db upgrade). 3-Adding the script
3.1-Add the script file (Example: PostDeployScript_Feature.ps1) to project at root level:
3.2- Edit script file: set the parameters $Url and $FeatureName. $FeatureName is in the format of ‘ProjectName_FeatureName’ (without quotes) and has nothing to do with feature title 2.
4- Go to project properties > SharePoint tab
4.1-Set Active Deployment Configuration to ‘No Activation’
4.2- Paste the below command in Post-Deployment Command Line box:
- Show Then Hide PS console (recommended):
%SystemRoot%\sysnative\WindowsPowerShell\v1.0\powershell
"start-process powershell.exe -ArgumentList
'$(ProjectDir)PostDeployScript_Feature.ps1'"
- Keep visible PS console (for debugging):
%SystemRoot%\sysnative\WindowsPowerShell\v1.0\powershell
"start-process powershell.exe -ArgumentList '-NoExit',
'$(ProjectDir)PostDeployScript_Feature.ps1'"
5- Save the project
6- Build > Deploy
Check PowerShell console window:
It stays visible if ‘-NoExit’ parameter used, otherwise it
will close automatically:
Now, check the target site for changes:
- Feature to be added to the required scope (for example a specific site collection)
- Web part will be added to Web Parts gallery at the site collection
- Web part can be inserted to page. If previously added to a page, the page will show the updated web part
Below are the contents of PostDeployScript_Feature.ps1:
# This is a Post-Deployment PowerShell script to be
called from Visual Studio to automate feature deployment
# Feel free to adjust to your needs
# Parameters
$Url = "https://servername.domain.com"
# $FeatureName is in the format:
[ProjectName_FeatureName] and has nothing to do with feature title
$FeatureName = "PSproj_Feature1"
write-host "Started.."
# When PowerShell version is 2 or more, create new
thread for 1st invocation then reuses it
$ver = $host | select version.
if ($ver.Version.Major -gt 1) {
$host.Runspace.ThreadOptions
= "ReuseThread"
write-host "ReuseThread"
}
# Add SharePoint snap-in if needed
if ((Get-PSSnapin
"Microsoft.SharePoint.PowerShell" -ErrorAction SilentlyContinue)
-eq $null) {
Add-PSSnapin
"Microsoft.SharePoint.PowerShell"
}
write-host "Microsoft.SharePoint.PowerShell
snap-in is loaded."
# If feature already enabled then disables &
retract it
$feature = Get-SPFeature -Site $Url | Where
{$_.DisplayName -eq $FeatureName}
if ($feature -ne $null) {
write-host
"Feature found in target site " $Url
Disable-SPFeature
-Identity $FeatureName -Url $Url -confirm:$false
write-host
"Feature deactivated."
Uninstall-SPFeature
$FeatureName
write-host
"Feature uninstalled."
}
else{
write-host
"Feature was not found in target site: " $Url
}
# installing the feature
Install-SPFeature -Path $FeatureName
echo ""
write-host "Feature installed to 15 hive."
# If feature already enabled then disable it, because
the enable is not complete (web parts are not copied
# to web part gallery in site collection)
# Note: feature will get automatically enabled when
installed if scope is either 'SiteCollection' or 'Web'
$feature = Get-SPFeature -Site $Url | Where
{$_.Displayname -like $FeatureName}
if ($feature -ne $null) {
Write-Host
"Feature is already activated at: " $Url
Disable-SPFeature
-Identity $FeatureName -Url $Url -confirm:$false
write-host
"Feature deactivated."
}
else {
Write-Host
"Feature is not activated at: " $Url
}
# Enable the feature
Enable-SPFeature -Identity $FeatureName -Url $Url
Write-Host "Feature got activated at: " $Url
write-host "Finished."
|
Subscribe to:
Posts (Atom)


